A DIY Diary: Quarantine Edition
A Powder Room Power- Up

I’ve recently moved into a new house; and like most, I have a list of projects to transform it into a home. Also like most, I’ve felt the overwhelming pressure of wanting everything I’ve envisioned to magically be done; and all at once. After realizing that’s not realistic (at least if you’re decorating on a budget like me) I decided to take it one project at a time. First up was the small, but mighty Powder Room.

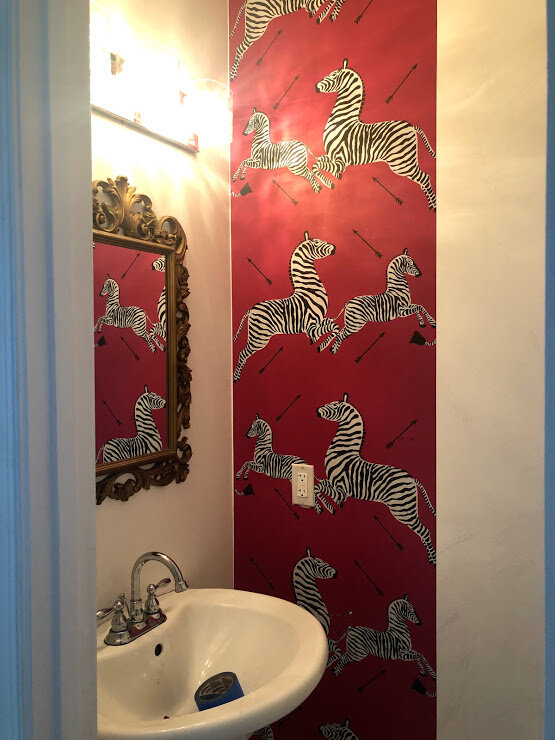
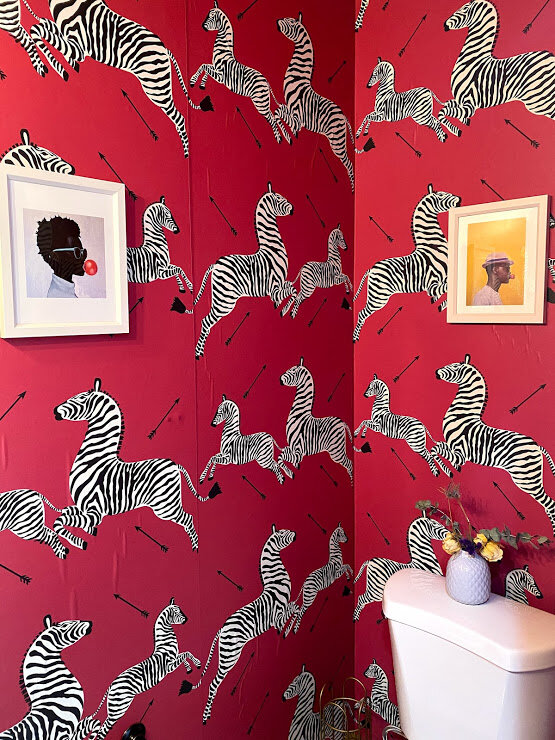
I love the design trend of going bold in small spaces, so I did just that. I remember coming across this amazing wallpaper with zebras all over it while on Pintrest. I soon learned it was an iconic Flora Scalamandre’ print (a well-known textile and wallpaper house) made specially for a former Manhattan restaurant called Gino’s; and later featured in the movie The Royal Tenenbaums. Of course a popular wallpaper like that would be out of my budget. After a brief sadness that my Scalamandre’ Powder Room dreams might not come true, I went to my secret weapon for all things unique- Etsy! Lo and behold I found an Etsy shop with a more affordable peel and stick, removable version of the print. It’s not quite the bright, bold red of the original, but it still packs a punch- or should I say kick.
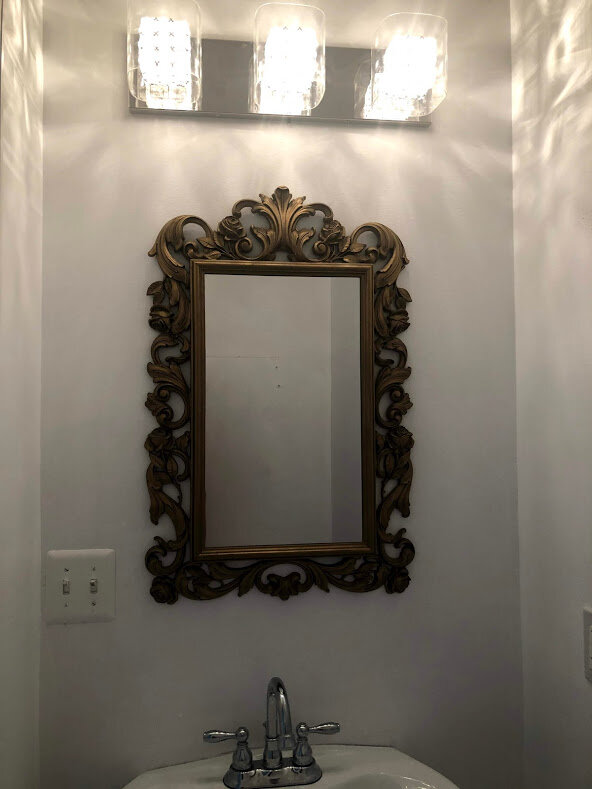
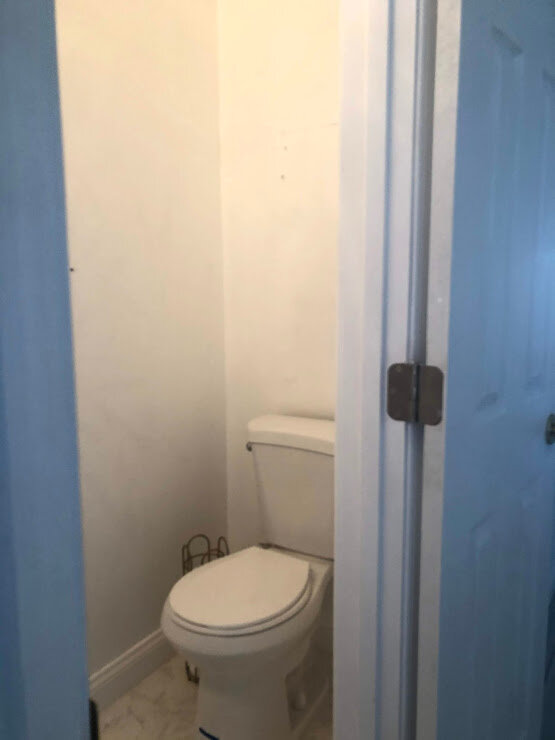
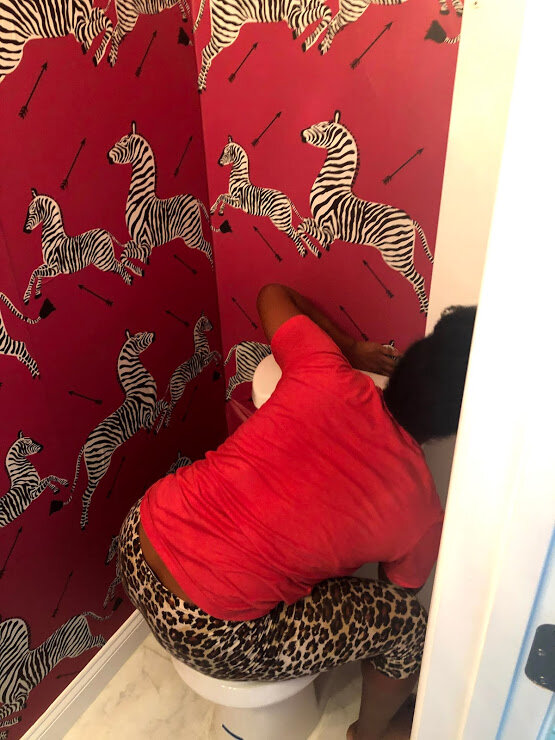
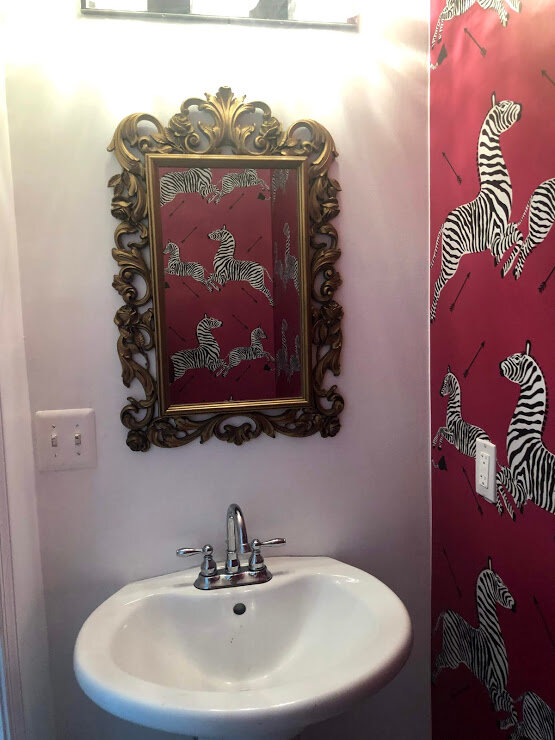
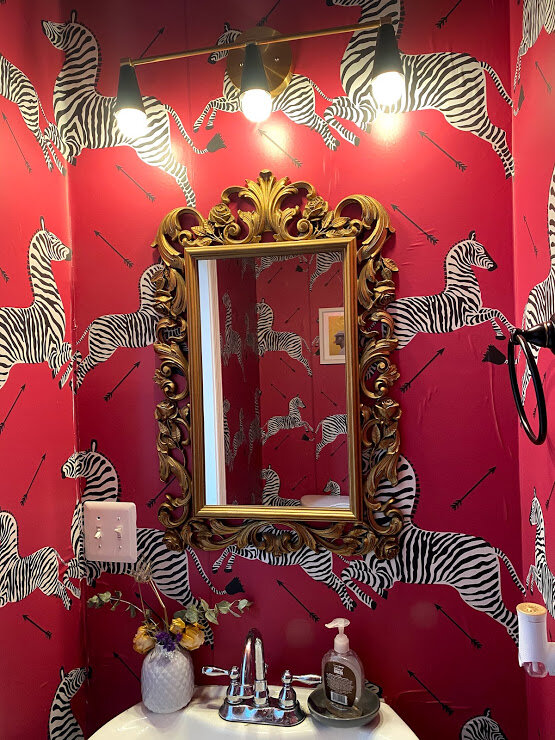
I’d used removable wallpaper only once before in a small bar area. I knew covering an entire room, although small, would be quite a challenge- and challenge it was! The hardest part was maneuvering around the sink and the toilet. Total nightmares for a wallpaper-installing novice like myself. I’m happy to report I survived the Hunger Games. Flaws and all, I’m pretty pleased with the results. The print itself is such an eye-catcher that you don’t need much else to complete the space. Also, more of anything else would be too distracting. I’m obsessed with antique mirrors so I kept the one I originally had in the room and switched out the light fixture for a mid-century sconce I also found on Etsy. The black and gold trim fixture was the perfect compliment to the mirror and wallpaper. I decided to add two small pictures with white frames to provide some slight contrast. I also added a small vase of fresh flowers (well they were fresh at the time- RIP). There’s something about live plants and flowers that I love-plus it doesn’t hurt to bring a little extra life to a space.

All in all, I’m really happy about the way my upgrade turned out. If you’re considering a removable wallpaper project in a powder room- big or small- here are a few tips and tools you’ll need:
Tools Needed:
- step ladder
- razor or exacto knife
- plastic smoother ( I also used this as a straight edge to cut paper cleanly at the base of the wall)
- level
- sponge and gentle cleaner ( I didn’t clean the walls before applying, but it couldn’t hurt)
Links to Products I Used:
My Top 3 Tips

1. Remove any and all fixtures preventing clear access to your walls (lights, switch plates, towel/ paper holders, etc.- even the toilet if you can). Trust me. It will make your life much easier. You want to be able apply the wallpaper evenly and smoothly and you peel off the adhesive backing. Working around the toilet and sink make it harder to easily remove the adhesive and get the smooth look.
2. Take your time and smooth out air bubbles as you go. Depending on the color and print of your paper, creases and air bubbles will be more or less visible. In my case, the bold, red wallpaper was very unforgiving. In some places where the wall wasn’t smooth, it made it challenging to eliminate creasing of the paper. Make sure to take your time and smooth the paper as you go. As you remove the adhesive, use a flat edge to smooth the paper down and into place. Try not to remove too much of the adhesive backing at once. It will make it more difficult to get the air bubbles out. The beauty of peel and stick, though, you can “dust yourself off and try again” (Aaliyah taught me).
3. Stop and restart at the corners. At one corner I was able to get the paper to crease perfectly, and another I wasn’t. To alleviate the headache, I recommend cutting the paper along the intersection of the corner, and starting with a new piece where the uncovered wall starts. Of course this isn’t always possible, but if you’re new to wallpapering, I suggest cutting and starting fresh whenever you can.
Powder Room Boost or Bust?
Would you take the plunge? Share your thoughts on this DIY project and other ways you’re giving your small spaces a lift.