5 Tips for…
Gallery Wall Glory

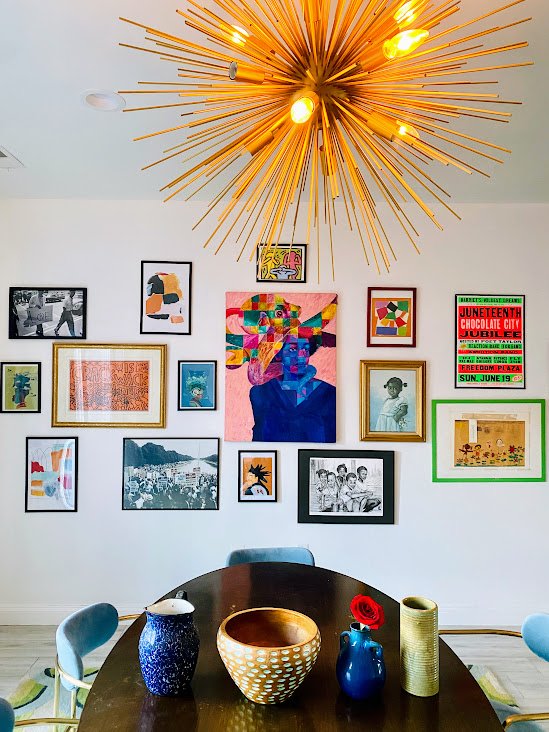
Since moving into my home in 2019, I’ve always envisioned my walls adorned with art, both original and collected. Much of the art I collected to start my gallery wall I’ve had since moving in. Fast forward almost 3+ years, and until a few weeks ago, my wall was STILL blank. Aside from tackling a first attempt DIY project, I recognized a few assumptions that prevented me from getting it done sooner, including some lessons learned along the way. And of course, I’m sharing them here with a stroke of good luck for your next DIY project.
Don’t be Afraid to Change Your Frame of Mind:
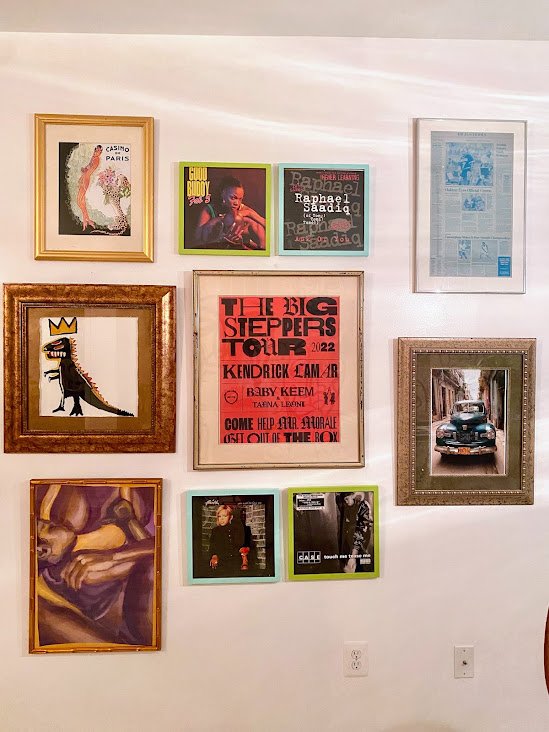
With a combination of original and collected art like posters and prints, my most grand DIY Gallery Wall vision included a wall full of professionally framed art, especially the original works. One of things that finally pushed me to get to work on my wall, was killing the misconception that my art had to be professionally framed. The gag about that is, professional framing can be oh so expensive, which was largely what pressed pause on my project. Is professional framing ideal? For sure, especially depending on the size, and value of the art you’re framing. BUT, it doesn’t have to prevent your process.
Pro Tip: Check your local thrift store for cheap, larger framing options.
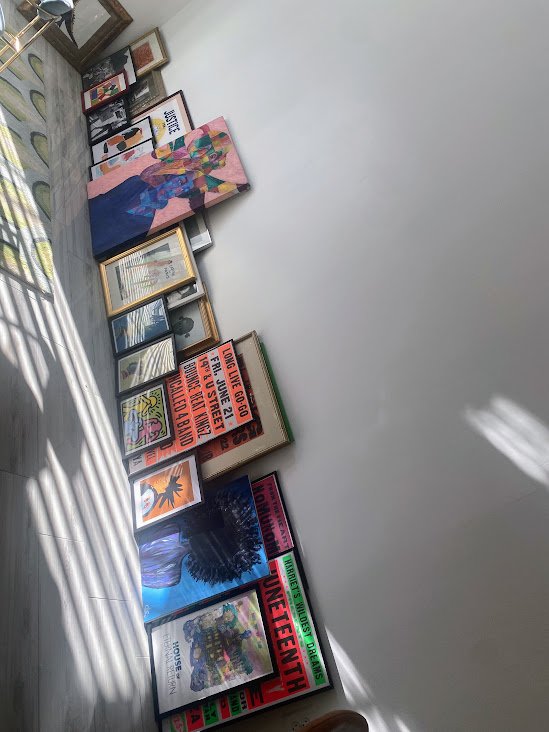
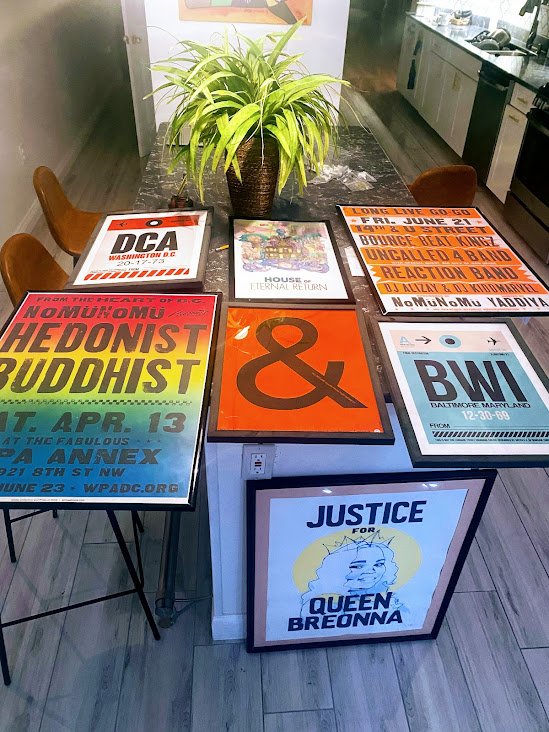
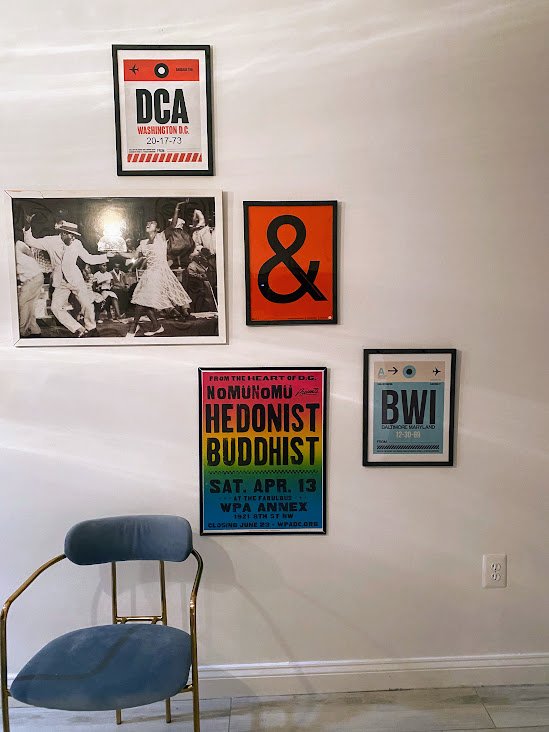
Spoiler Alert: Is this option also a bit of a crap shoot, sho is! But that’s the thrill and adventure of the thrift store. Don’t let it discourage you from giving it a try. If you have exact measurements of some of the art you’re working on framing- even better. A perk of going the vintage route, many of the frames already come with matting, perfect for reuse depending on the dimensions of the art. Out of about 11 frames I sourced from the thrift store, 6 of them worked perfectly, with only one of them requiring some additional imagination. The other 5, well those stories are yet to be told since the remainder of my gallery wall is still in progress. The best part: I have 5 frames to get me started on Phase 2, and I can choose work specifically to fit.
When in Doubt, Click Add to Cart:
Another option for getting that art on the wall is buying frames from places like Amazon, Target, Walmart, Michael’s, etc. Again, an ideal option for art that has standard sizing, and you’re comfortable with housing in a cheaper frame. Even if you decide to purchase a larger frame from one of these retailers, framing and hanging is still super easy. Many frames come with the necessary hardware to hang.
So… Tell Me What’s Your Focal Point?
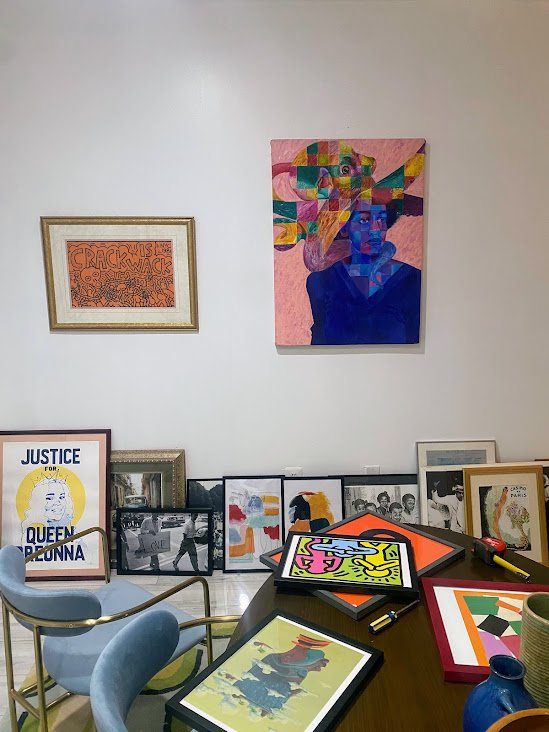
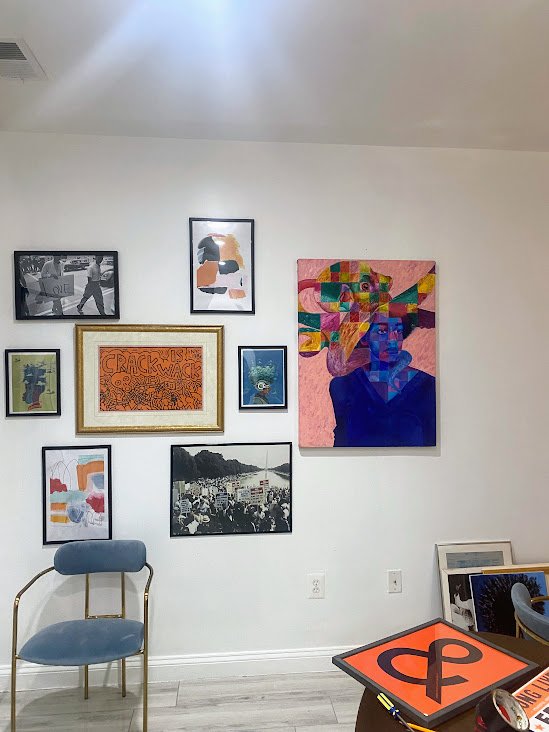
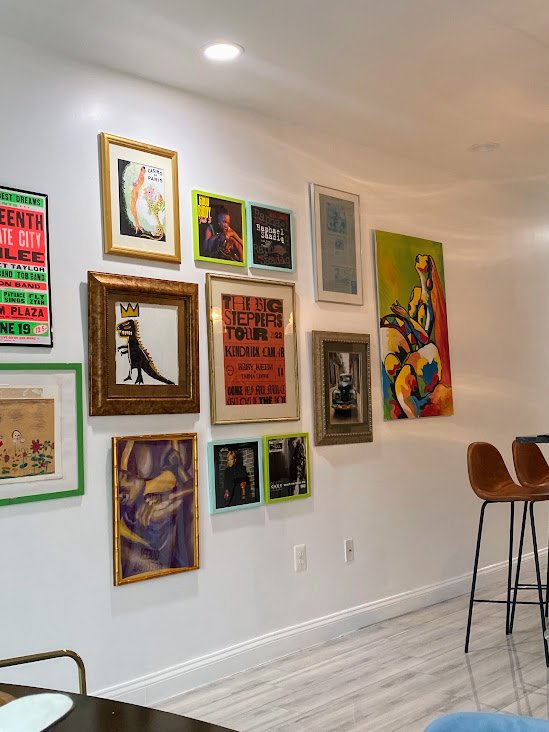
The size (length and width) of your wall, and the sizes of your art should dictate how you curate your wall. I have a pretty long wall and quite a bit of art of varying sizes. It was a bit daunting when deciding how and where to start. However, it was helpful to have two very large pieces already hung in two distinct sections of the wall, giving me anchors to build the rest of the wall around.
Pro Tip: Allow your largest or most irregular shaped frames or objects (especially if your wall includes more than just art) to be the focal point for curating the rest of your wall. It will help to provide balance and visual contrast when the eye has varying points to land and focus.
Who Says You Can’t Regulate Irregularity…
I’m sure a quick Google search will pull up pages of articles from the pros with rules, tips, and directions on how to hang your gallery wall; and the specific measurements to go with each. Again, due to the size of my wall and the varying sizes of my art, I knew playing by the rules probably wouldn’t work. Not to mention, it’s just not my style anyway! Instead, I used my largest pieces as anchors and chose a measurement I was comfortable with and used it to maintain consistency. I chose 3in as my constant measurement. While every frame is not placed 3in from the other, because visually some things just looked better further or closer together, when starting a new section, or unsure of how far apart to place an anchoring piece, I went back to my 3in rule, which helped to provide balance and continuity as I designed my wall.
Pro Tip: Whether you choose to follow the pros or not, consistency is key. Choose a measurement you’re comfortable with and stick to it.
Forget the Rules… of Thumb and Design
Well, they don’t call it DIY for nothing, which in my book means there are no rules! And that’s just the way I like it. The beauty of DIY is just that, doing it by and for yourself. So whether you choose to play by the rules or not, there’s no right or wrong way to curate your space. The joy is in creating something to your satisfaction and no one else's. At any moment you start to feel discouraged or unsure about the outcome, keep going and keep believing in your vision! Do first time attempts sometimes require a pivot? Of course. During another DIY project attempt, I intended to paint an ombre wall. Long story short, what resulted was a two-toned wall, but I didn’t panic (OK I lied- I did a little!) and ended up loving the result. All that to say, don’t let having to make changes or adjustments on the fly deter you. Keep going, keep believing in your vision, keep believing in your ability to create something you’ll love!